A small river is a useful place to learn trout fishing because you can often see the current, cover and casting problems from the bank. This guide is for freshwater rainbow trout in a modest North American stream, using either light spinning tackle or a simple fly outfit. It is not a steelhead guide, and it does not establish that your chosen river is open to every method described.
Identify the fishery before choosing a lure
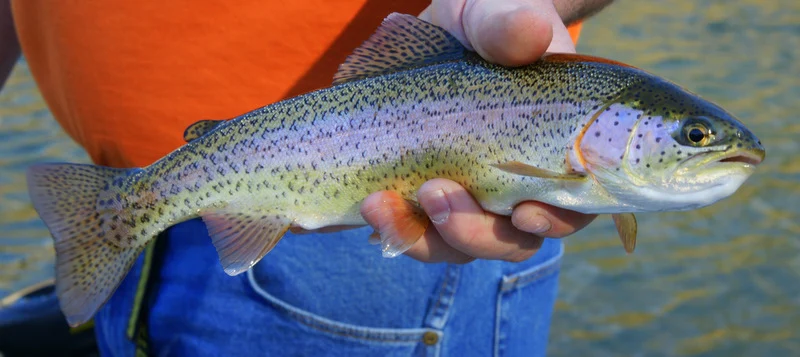
Rainbow trout are Oncorhynchus mykiss. Steelhead belong to the same species but migrate to sea and return to freshwater. Brown trout, Salmo trutta, and brook trout, Salvelinus fontinalis, are different fish that can share some North American trout waters. Learn the local identification guide; colour alone, or resemblance to a stocked fish, is insufficient for a retention decision.
A specific example is Oregon's Fall River near Sunriver, where the hatchery provides foot-trail access to a clear spring-fed stream with rainbow/redband trout as well as other trout species. Choose an accessible open reach above Fall River Falls. Oregon's 2026 rules make this fly-fishing-only water with barbless hooks and release of wild rainbow trout; the spinning method below is for other waters where it is permitted. Check the current Central Zone rules and updates before travelling.
Rainbow trout eat invertebrates and, in some situations, smaller fish. That gives anglers several ways to present a plausible meal. You will learn faster by choosing one method for the first session than by switching constantly between bait, spinners and flies without understanding any of them.
Where rainbow trout live and what they eat
Rainbow trout are native to western North America and have been introduced widely beyond that range. Connected coldwater habitat matters throughout their life cycle. For this guide, concentrate on resident fish in streams: a stocking record or local fisheries survey is better evidence of presence than a mountain-stream appearance. Introduced populations are not a reason to move fish yourself.
Within a river, habitat includes both the channel shape and its shelter: pools, riffles, submerged wood, boulders, undercut banks and vegetation. Fish may use different parts of this mosaic as flow and temperature change. There is no single correct fishing depth for all small rivers. Start with an observable lane, then adjust the lure or fly until it reaches that lane without repeatedly snagging.
Forage changes the presentation. Aquatic insect larvae, terrestrial insects such as ants and grasshoppers, crustaceans, snails, leeches, fish eggs and small fish are possible foods. Those are possibilities across habitats, not a statement that every stream offers every item. A small fish taking drifting insects may need a much smaller offering than a larger trout chasing minnows. Watch actual feeding before declaring a hatch or a preferred prey.
An insect moving beneath the surface suggests trying a nymph; a visible surface rise suggests testing an appropriate dry fly; active pursuit of small fish suggests a small streamer or minnow-shaped lure. Spinners and spoons can attract fish without being exact insect replicas. These are tactical interpretations of feeding behavior, not guarantees, and the legality of natural bait or egg imitations must be checked locally.
Choose a method for the holding position
The dimensions below are illustrative starting ranges for a modest stream and small-to-medium resident trout. Wind, depth, flow, fish size and hook restrictions can require a different choice. Fly sizes and lure weights are not interchangeable measures.
| Holding position or observation | Lure or fly category | Starting example | Presentation to practise |
|---|---|---|---|
| Broken-water seam beside a rock | Inline spinner | About 1/16–1/8 oz, within the rod rating | Cast slightly upstream, recover slack and keep the blade working as it approaches the pocket |
| Deeper open pool edge | Small spoon or jig | Light enough to control without dragging the bed continuously | Let it settle briefly, then use short lifts or a steady swimming retrieve; change the sink count in small steps |
| Trout feeding below the surface | One nymph | A size 12–16 general nymph as an initial example; match observed food where possible | Drift through one lane with minimal drag; adjust indicator depth or weight before adding another fly |
| Repeated rises to small insects | Dry fly | A locally appropriate pattern and size; observe the insect rather than guessing from season alone | Place the fly upstream of the rise and manage slack so it follows the surface naturally |
| Minnow pursuit along an open bank | Small streamer or minnow plug | Approximately 3–5 cm for an introductory spinning example | Retrieve along the bank at a controllable depth; compare a steady pass with brief pauses |
| Cold, slow edge without surface activity | Small nymph | A small midge pattern may be useful where that food is present | Use short, deliberate drifts close to the holding lane; do not assume the fish will chase far |
Choose one row for the first station, not all six methods at once. If the spinner passes above the fish, first adjust angle or depth. If a dry fly drags sideways, shorten the cast or manage the line; another color will not fix competing currents. If a nymph repeatedly anchors on the bottom, reduce depth or weight. A well-controlled simple presentation supplies more useful information than a complicated rig you cannot follow.
Look for a feeding position with shelter
Current breaks, deeper pools and steep or undercut banks provide useful stream-trout habitat. Picture the fish's task: intercept food without spending all its effort fighting the strongest flow. The edge between a fast tongue and quieter water is often a better starting question than the center of the fastest rapid.
Observe a pool from downstream or from a position where you can remain inconspicuous. Look for a slow pocket behind a rock, the edge of the main current and cover beside the bank. Dark water alone does not establish depth; shadows and reflections can fool you. Choose a casting position and a landing position before approaching closer.
Fish nearby water first and keep your shadow off the likely holding area when practical. Short, controlled casts let you see how the lure or fly travels. A heroic cast to the far bank adds slack, branches and another current seam to manage.
A light spinning setup you can understand
An illustrative starter outfit is a 6–7 ft light spinning rod, a 1000–2000-size reel and 4–6 lb nylon. Tie the spinner directly to the nylon or use a small, suitable lure snap; no extra sinker is needed. With thin braid instead, add roughly 60–100 cm of 4–6 lb leader. Adapt the line and rod to fish size, current and obstacles; deliberately underpowered tackle is not a requirement for trout fishing.
Carry a small selection of spinners around 1/16–1/8 oz, roughly 1.8–3.5 g, that fit the rod rating. Confirm whether single hooks, barbless hooks or artificial-only methods apply. A small spoon offers another option, but learn one lure's action before making it a comparison exercise. Use a suitable, compact swivel only when the lure and line-twist problem justify it.
Keep a soft net and hook-removal tool within reach. A bank session lets you concentrate on presentation without adding wading to the lesson.
Work a spinner through one lane
Begin with a short cast slightly upstream and across a manageable current. Close the bail and recover enough slack to maintain contact as the lure moves downstream. The blade must turn; occasionally test it close to you where you can see the action. Retrieving too slowly can stall some spinners, while excessive speed can pull them high and away from the intended lane.
Follow the lure's path with the rod without allowing a huge bow of line to develop. In a deeper pocket, adjust the cast angle or allow a little more settling time where snag risk permits. If the lure strikes bottom every pass, reduce that time or choose a lighter presentation. Learn the route before changing color.
A take may be a tap or a sudden increase in weight. Continue winding and lift smoothly to set the hook without snapping light line. If a fish follows but does not take, compare a different angle or a brief speed change before recasting repeatedly over it. Natural silver or dark finishes provide sensible visibility comparisons; no colour compensates for a stalled blade or wrong depth.
A simple fly alternative
For a first lesson on a modest river, a 9 ft, 5-weight rod with matching floating line is a practical all-round example. A tapered leader around 7½–9 ft ending in 4X or 5X can be a starting point for small dry flies or nymphs, depending on fly size, fish and cover. These are examples, not rules; leader diameter needs to suit the actual fly and current.
A dry fly is intended to float with the surface flow. Cast a short distance upstream of the likely fish, keep excess fly line off competing currents and watch whether the fly suddenly skates unnaturally. Repositioning or shortening the cast often solves more than changing to a different pattern. Practice lifting and placing line gently before adding distance.
For a simple subsurface rig, connect the tapered leader to the floating fly line, finish with about 40–60 cm of matching 4X or 5X tippet, and tie on one size 12–16 beadhead nymph. Check the tippet spool's actual breaking strength; X sizes describe diameter and are not a universal pound rating. Attach a small adjustable indicator to the leader, initially around the estimated water depth above the fly. Angled drifts may require more distance. Use a weighted fly before adding complexity, and check any local limits on added weight.
Cast upstream of the lane, give the fly time to settle and mend only enough line to prevent drag. If the indicator stops, dips or moves differently from the surrounding bubbles, lift gently while recovering slack. If it hangs at the same place every pass, reduce depth or weight. A fly that never approaches the fish's layer may need a longer upstream lead, a slightly heavier bead or a deeper indicator setting. Change one at a time.
For a surface alternative, remove the indicator and nymph and tie on one dry fly matching the approximate size of visible insects. A size 14–18 fly is an initial comparison, not a hatch prediction. After a fish takes, lift smoothly once it has closed over the fly; pulling at the first splash often removes it too soon.
Build a session around three features
For a Fall River example, begin with the fly outfit, a single barbless size 16 nymph and a short cast from a permitted hatchery-area bank position. Watch the clear water before moving close. Select a pool edge, a current seam and an open pocket; these are illustrative features to identify on arrival, not a promise about today's water level.
Spend fifteen minutes at each, adjusting the indicator in small steps until the fly drifts through the chosen layer. If the first drift snags, reduce depth rather than repeatedly setting the hook. If a fish feeds near the surface, switch to the single dry fly and compare a short upstream cast with one angled slightly across. After about an hour, revisit the most informative feature with one specific improvement. On a spinner-permitted stream, follow the same sequence with a 1/16 oz spinner, adjusting angle and settling time before lure colour.
Adjust to season and conditions
In cold water, compare slower pool margins with the faster feeding seam, and use smaller nymphs when tiny insects are the available food. A warmer part of the day can be worth testing; dawn is not a universal requirement. In clearer water, reduce splash and line drag. In coloured water, a slightly stronger silhouette may improve visibility, but test it at the same depth before declaring a colour winner. Rising flow can make a near-bank pocket more controllable than the main current. No numerical temperature or bite window applies to every population.
Land, release and record
Land promptly, keep released fish wet and supported, and avoid the gills. Avoid redds and visible spawning fish; stop when warm-water advice or unsafe flow makes fishing inappropriate. Clean gear before moving between waters. Record the feature, fly or lure, depth adjustment and observed response so the next visit starts with evidence rather than a remembered lucky colour.